Access to GitLab
Mind Studios GitLab web interface is located hereopen in new window. If you don't have an account yet (or you don't have required permissions) then ask your team leader to create account for you (or to give the necessary permissions).
SSH Keys
For cloning project and pushing your changes to repository you should use Secure Shellopen in new window (SSH) network protocol (in our company you must use SSH 😊). In order to use SSH you need to add your SSH key (or keys) to GitLab. SSH keys allow you to establish a secure connection between your computer and GitLab. Before you can add the SSH key you need to generate it (read hereopen in new window how to do it). After the key is generated the public part of the key needs to be added in profile, section SSH Keysopen in new window.
If you need to know how the SSH protocol works you can read this articleopen in new window for more details.
Creating New Project at GitLab
In your dashboard, click the green
New projectbutton or use the plus icon in the upper right corner of the navigation bar or the"+"(plus) button on the left of the search field in the navigation bar.
This action opens the New project page:

- Select
Project path, it can be selected between Users and Groups (if you have necessary permissions). - Enter the name of your project in the
Project namefield. You can't use special characters, but you can use spaces, hyphens, underscores. For project name you can't use reserved namesopen in new window. The Project description (optional)field enables you to enter a description for your project's dashboard, which will help others understand what your project is about.- Changing the
Visibility Levelmodifies the project's viewing and access rights for users. Select Private level.
- Select
Click the
Create projectbutton.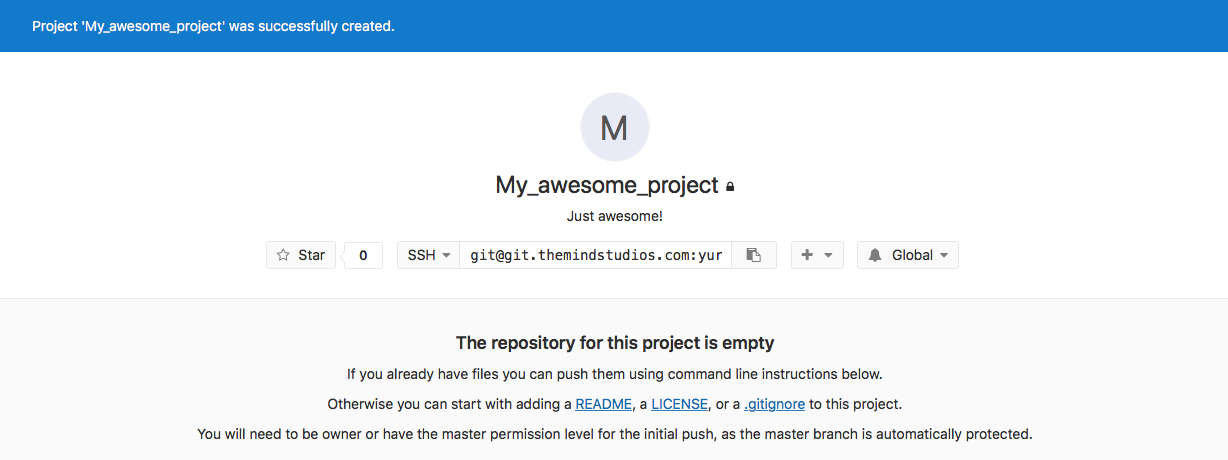
Use
Command line instructionsunder the project header to setup a new repository or update existing repository and commit / push your changes to GitLab.
Setting up New Project
Required settings
You should setup main branches according to Branching strategy. Main project branches should be protected!
Creation and protection of the branches
Create master branch via first push to GitLab repository.
Create staging and development branches from master using GitLab
Repository -> Branchesby pressing the greenNew branchbutton.
...then, enter
Branch nameand click theCreate branchbutton: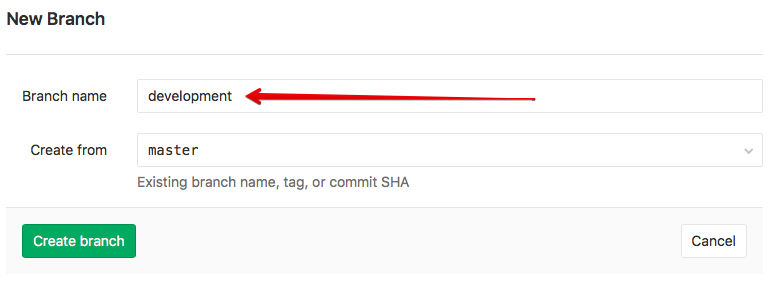
Protect main project branches master, staging, development. Protected branches should be configured in every project. Protected branches can be managed in
Settings -> Repository.- Click the
Expandbutton inProtected Branchessection:
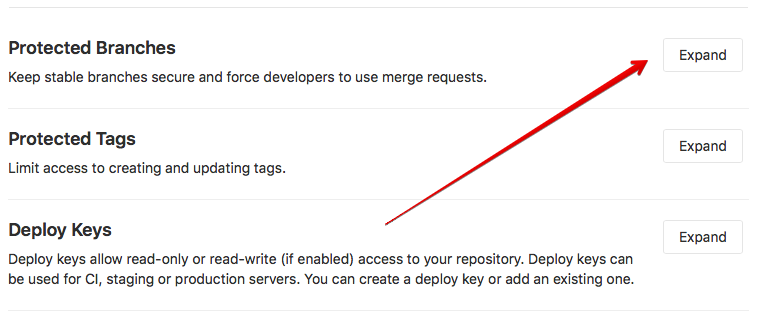
- Select branch and click the
Protectbutton:
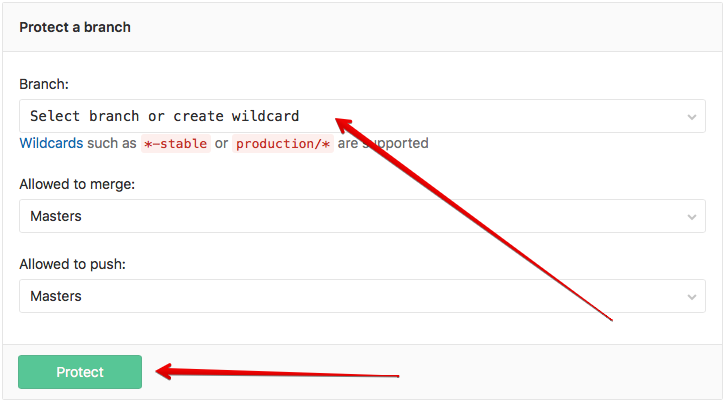
After setting up the branches you should get branch structure like on screenshot below:

- Click the
Depending on project and testing needs the maintenance branch can be created. The maintenance branch contains the latest “release” code. This branch should be protected too.
Integrations setup
Webhooks can be used for binding events when something is happening within the project. Project webhooks allow you to trigger a URL if for example new code is pushed or a new issue is created. You can configure webhooks to listen for specific events like pushes, issues or merge requests. Navigate to the webhooks page by going to your project's Settings -> Integrations.

Enter Webhook URL to the URL field, select at least one trigger and press the green Add webhook button.

After the webhook was added you can trigger it manually for testing.
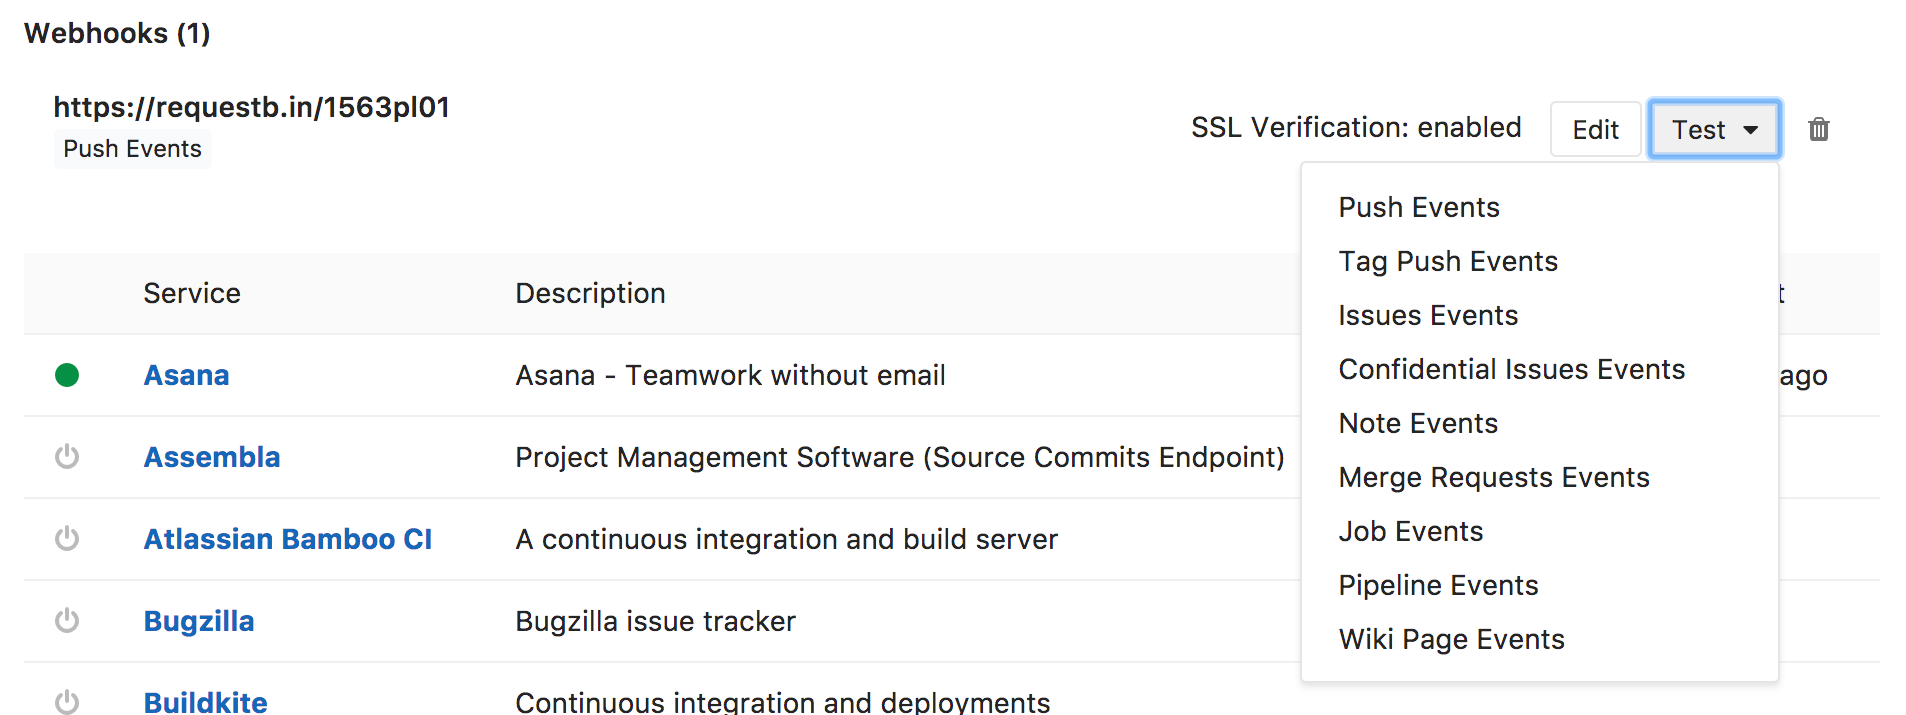
You can also use Project services. Project services allow you to integrate GitLab with other applications like Slack, JIRA, Redmine etc. About setting up a Slack integration you can read here.
Other options
You can update your project name, description, avatar and add tags in
General project settings. Also you can find the Project ID on this page, but you can't change it.
If you need to change
Project pathof your project you can do it inSettings -> General -> Advanced settings. Also you can changeProject namefrom this menu and remove project 😊.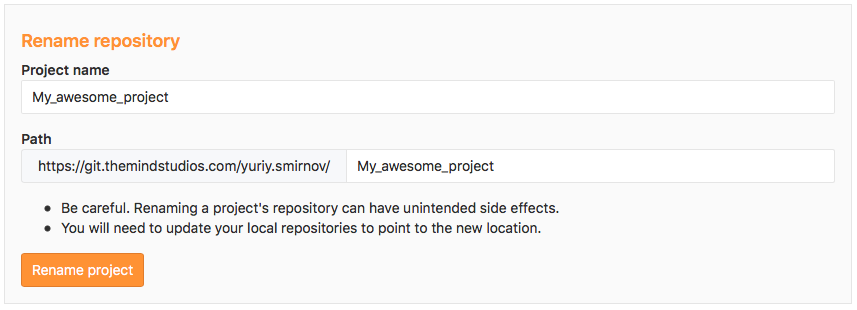
You can add a new member to your project or share it with another group in
Settings -> Members. Also you can choose a role permission for user or set maximum access level for a group. Access expiration date can be selected for users and group too.
Notes
More information about protected branchesopen in new window.
More information about project permissionsopen in new window.
